Creating Quests

Example Quest
EliteMobs comes prepackaged with a test_quest.yml, which will be analyzed here as a simple quest format to follow.
Custom Quests are in the ~plugins/EliteMobs/customquests folder!
test_quest.yml
isEnabled: true
customObjectives:
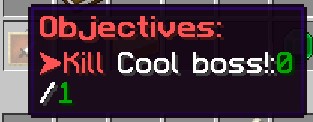
Objective1:
amount: '1'
filename: test_boss.yml
objectiveType: KILL_CUSTOM
customRewards:
- filename=magmaguys_toothpick.yml:amount=1:chance=1
name: "&aKill the Test Boss"
questLore:
- "&cEnd the test boss'' reign of terror!"
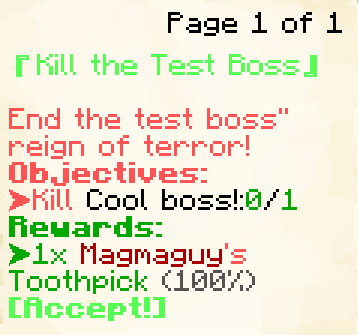
If your quest UI does not look like this you can change it to match using /em alt.
This example quest will give players the task of slaying 1 test_boss.yml. (The actual name of the boss displayed in the quest tracker will be the name: set in test_boss.yml.) And as a reward for completing the quest they will be rewarded with 1 Magmaguy's Toothpick.
Creating Custom Quests
isEnabled
Sets if the quest is enabled.
| Key | Values | Default |
|---|---|---|
isEnabled | Boolean | true |
Example
isEnabled: true
customObjectives
Sets the quest objectives.
| Key | Values | Default |
|---|---|---|
customObjectives | Special [1] | none |
Note: If you are using a multiphase boss as your objective then the objective should be using the first phase as the target.
Examples
KILL_CUSTOM:
customObjectives:
  Objective1:
    amount: '1'
    filename: my_cool_boss.yml
    objectiveType: KILL_CUSTOM
DIALOG:
customObjectives:
  Objective1:
    dialog:
    - "&a[Dialog NPC] &fCome here often?"
    - "&7&oI should eat more apples."
    filename: dialog_npc.yml
    npcName: Dialog NPC
    location: at dialog location.
    objectiveType: DIALOG
FETCH_ITEM:
customObjectives:
  Objective1:
    amount: '99'
    itemName: Red Apples
    filename: my_quest_item_red_apples.yml
    objectiveType: FETCH_ITEM
ARENA:
customObjectives:
  Objective1:
    objectiveType: ARENA
    filename: my_arena.yml
    name: "Complete the Arena"
Special [1]
Expand Table
Custom Objectives are constructed using the following values:
| Key | Description |
|---|---|
KILL_CUSTOM / FETCH_ITEM / DIALOG / ARENA | Used to set the type of objective this represents. KILL_CUSTOM indicates the quest involves killing a specific Custom Boss, FETCH_ITEM indicates that the quest involves getting a specific Custom Item, DIALOG indicates that the quest involves talking to an NPC, and ARENA indicates that the quest involves completing a specific arena. |
filename | Used to set the file name of the Custom Boss, the Custom Item that the player has to kill / obtain, the NPC they have to talk to, or the arena they must complete. |
amount | Used to set the amount of Custom Bosses that must be killed or items that must be obtained. Defaults to 1 if not specified. |
dialog | Used to set the dialog of the NPC the player talks to. |
name | Used to set the name of the quest objective, be it an NPC, a custom item, or an arena. For visual purposes only. |
itemName | Used only with FETCH_ITEM – This setting changes how the item's name appears in the quest tracker. It allows you to display a custom name that’s different from the actual item’s in-game name. |
Please note that every Custom Objective field is separated with a : !
customRewards
Sets the quest rewards.
| Key | Values | Default |
|---|---|---|
customRewards | Universal EliteMobs loot format | none |
Example
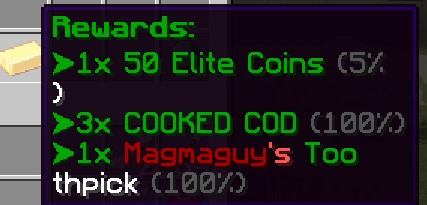
customRewards:
- currencyAmount=50:amount=1:chance=0.05
- material=COOKED_COD:amount=3:chance=1.0
- filename=magmaguys_toothpick.yml:amount=1:chance=1.0
Note: Custom quests do not auto-generate rewards. If you leave customRewards empty, the quest grants nothing on completion, so always define rewards explicitly. (Automatic level-scaled rewards — currency and items based on quest difficulty — apply only to procedurally generated Dynamic Quests, not to config-defined custom quests.)
questAcceptPermission
Sets the permission the player must have in order to accept the quest.
| Key | Values | Default |
|---|---|---|
questAcceptPermission | String | none |
Example
questAcceptPermission: elitequest.my_permission
questAcceptPermissions
Sets the permissions the player must have in order to accept the quest.
| Key | Values | Default |
|---|---|---|
questAcceptPermissions | String List | none |
Example
questAcceptPermissions:
- elitequest.my_previous_quest_one.yml
- elitequest.my_previous_quest_two.yml
questLockoutPermission
Sets the permission that the player will get upon completing the quest which will lock them out from doing the quest again. If not specified, no lockout permission is assigned and the quest stays open.
| Key | Values | Default |
|---|---|---|
questLockoutPermission | String | none |
Example
questLockoutPermission: elitequest.my_quest.yml
questLockoutMinutes
Sets how long, in minutes, the player will have to wait before being able to do the quest again (works by removing the quest lockout permission).
| Key | Values | Default |
|---|---|---|
questLockoutMinutes | Integer | -1(will never repeat) |
Example
questLockoutMinutes: 60
name
Sets the quest name. Accepts Color Codes.
| Key | Values | Default |
|---|---|---|
name | String | none |
Example
name: "&aMy Great Quest Name"
questLore
Sets the lore of the quest that will appear in the in-game quest menu.
| Key | Values | Default |
|---|---|---|
questLore | String List | none |
Example
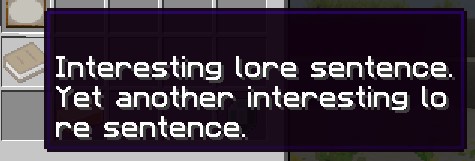
questLore:
- "Interesting lore sentence."
- "Yet another interesting lore sentence."
temporaryPermissions
Sets the permissions assigned to the player until they turn the quest in.
If you're using this setting to ensure that an item only drops when players have a specific quest active, you'll also need to configure the Same Permission in the item's configuration file.
| Key | Values | Default |
|---|---|---|
temporaryPermissions | String List | none |
Example
temporaryPermissions:
- elitequest.item_that_should_drop_only_during_quest.yml
questAcceptDialog
Sets the dialog that appears in chat upon quest acceptance.
| Key | Values | Default |
|---|---|---|
questAcceptDialog | String List | none |
Example
questAcceptDialog:
- "My hero! You are so helpful!"
- "I wish you the best of luck!"

questCompleteMessage
Sets the dialog that appears in chat upon quest completion.
| Key | Values | Default |
|---|---|---|
questCompleteMessage | String List | none |
Example
questCompleteMessage:
- "My hero! You have completed my difficult quest!"
- "As a reward you can have this loaf of bread!"

questCompleteCommands
Sets the commands that will run upon quest completion. Supports placeholders: $player for the player's name, and $getX, $getY, $getZ for the player's location coordinates.
| Key | Values | Default |
|---|---|---|
questCompleteCommands | String List | none |
Example
questCompleteCommands:
- say $player has finished a quest at $getX, $getY, $getZ!
- give $player diamond 1
![]()
turnInNPC
Sets the filename of the NPC that the players need to talk to/interact with to complete the quest. This does not have to be the same NPC that handed out the quest.
| Key | Values | Default |
|---|---|---|
turnInNPC | Filename | none |
Example
turnInNPC: my_cool_quest_npc.yml
Quest Givers
To assign a quest to an NPC who will give it to players, you need to configure the NPC file, not the quest file.
In your NPC configuration file (~/plugins/EliteMobs/npcs/), add:
questFileName: my_quest.yml
For NPCs that give multiple quests:
questFileName:
- quest_one.yml
- quest_two.yml
See the NPC creation documentation for more information on configuring NPCs.
trackable
Sets if the quest will use the quest tracker.
| Key | Values | Default |
|---|---|---|
trackable | Boolean | true |
Example
trackable: true
questLevel
Sets the level of the quest. This is only a visual guide so the players can tell how challenging the quest will be. This does not in any way modify boss, item or other levels.
| Key | Values | Default |
|---|---|---|
questLevel | Integer | 0 |
Example
questLevel: 10
questAcceptSound
Sets the sound that plays when a quest is accepted. It is possible to both play Minecraft sounds and play sounds from a resource pack.
| Key | Values | Default |
|---|---|---|
questAcceptSound | String | none |
Example
questAcceptSound: entity.experience_orb.pickup
questCompleteSound
Sets the sound that plays when a quest is completed (turned in). It is possible to both play Minecraft sounds and play sounds from a resource pack.
| Key | Values | Default |
|---|---|---|
questCompleteSound | String | none |
Example
questCompleteSound: entity.player.levelup
Localization Support
The following fields support localization for multi-language servers:
namequestLorequestAcceptDialogquestCompleteMessage
This allows you to provide translations for different languages on your server.
Permissions
As mentioned in the tables above, permissions are usually Strings or String Lists. But let us go into more detail how you will be using these to lock and unlock quests.
Let us say that you are making quest_3 in a series of quests that you have planned and you do not want players to be able to take quest_3 before they finish quest_2. We would configure the quest file like this:
questAcceptPermission: elitequest.quest_2.yml
questLockoutPermission: elitequest.quest_3.yml
By setting the questAcceptPermissions to elitequest.quest_2.yml we have now prevented players from taking quest_3.yml before they finish quest_2.yml.
By setting questLockoutPermission to elitequest.quest_3.yml we have prevented players from being able to receive that quest as long as they already have that quest in their tracker or if they already finished that quest. This stops players from being able to repeat the quest.
Should you want to make a quest that only becomes available after the players have completed a series of quests, then you would configure the quest file like this:
questAcceptPermissions:
- elitequest.quest_2.yml
- elitequest.quest_3.yml
- elitequest.quest_4.yml
If you want players to only be able to loot certain items when they have the correct quest active, then we can do that by using temporaryPermissions. We would make a permission in the quest file using temporaryPermissions then make a matching permission in the item file using permission.
For example we would open up our quest file and add the following:
temporaryPermissions:
- elitequest.my_cool_item.yml
Then we would open up the item file, in our case my_cool_item.yml and then add the following:
permission: elitequest.my_cool_item.yml
Both files have now matching permissions which should now make our item only drop when the players have the correct quest active.
Dynamic Quests
Dynamic Quests are procedurally generated quests that are automatically created and refreshed by EliteMobs. Unlike custom quests defined in configuration files, dynamic quests require no manual setup and adapt to each player's progression.
How They Work
- Quest Tier: A player's dynamic quest tier is derived from their combat level:
tier = combatLevel / 5, clamped to a range of 1 to 20. For example, a player with combat level 45 will receive tier 9 dynamic quests. The quests themselves (and their rewards) are scaled to the player's actual combat level, which is clamped to a range of 1 to 100. - 3 Quests Per Tier: For each of the 20 quest tiers, the system generates exactly 3 random quest objectives at a time. Players are offered the 3 quests matching their current tier.
- Auto-Refresh Cycle: The pool of dynamic quest objectives is regenerated every 60 seconds (every 1200 ticks). When the pool refreshes, new objectives replace the old ones, giving players a rotating selection of tasks.
- Dynamic Dungeon Adaptation: When a player enters a dynamic dungeon with a specific level selection, all of their active dynamic quests adapt to match the dungeon's mob level. The quest level, objectives, and display name are updated accordingly so that quests remain relevant to the dungeon content.